Time Line control has made quite a journey from being a restricted control with not much to configure to the current day Time Line control where you can basically display the most important / relevant information associated to the parent record in a much better way and with easy configurations.
One can still argue that we can probably replace the Time Line control with an advanced control that could be developed using PCF or even a Canvas app. Off course this may provide a better visual / graphical experience which is still lacking in the current Time Line control (where only a list of record is displayed). However it depends on the purpose it could serve and the budget you want to invest. But MS is progressing in the right direction by building more and more productivity features within the platform.
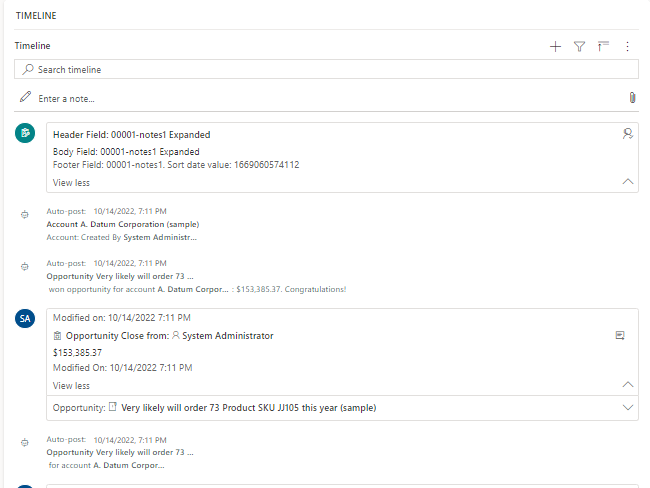
The current Time Line control gives you quite a bit of flexibility around the information of an activity record you want to show. You can find the details here in the MS Learn Site. Here you will know better how to configure which records to display, what filter options are available, how are the records sorted, and even how you can use card forms of each activity record types in the Time Line Control (my current favorite :)).
With D365 2022 Wave 2 release, we can now configure more than one Time Line control on a single form where you get additional flexibility to showcase more relevant records in each time line control. Find more information here in the release notes.
On top of all this, like an icing on the cake :), we now have a way to bring in unrelated records on the Time Line using Custom Connector available for Time Line control. Find more on this here.
At this point I started thinking different possibilities that we now have from custom connector on the Time Line Control. And here I am writing about one of the straight forward possibility – Calling Power Automate flow from a Time Line control leveraging this custom connector.
When you go thru custom connector documentation on MS learn site here, you will understand that you need to leverage JavaScript code that conforms a specific interface. Based on the sample JavaScript shared I extracted the piece of code where you can define the command to run Power Automate flow –
- Firstly, write a Power Automate flow which has a trigger “When a http request is received” as shown below –

- Copy the request URL from the above trigger after saving the Power Automate flow
- Now in the sample custom connector JavaScript code find the function “createCommands” paste the above https request URL copied in the above step as shown in the below –

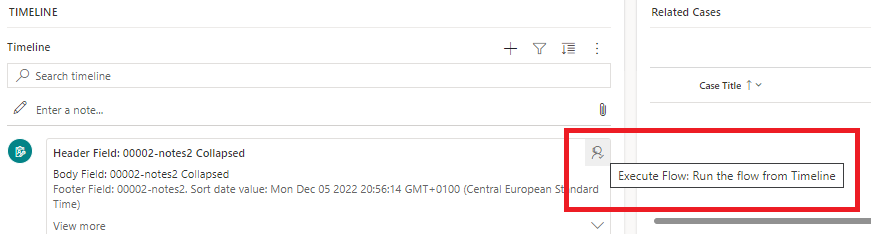
- On the Time the record is displayed with a action command as shown below – which shows that the label is same as that in the above JavaScript code
Voilà!!!
This is just a simple notion of what can be done, similarly there could be many possibilities like calling a HTML web resource from the Time Line control or even launch a Canvas App. You can also execute XRM Client APIs to retrieve any information from the Dynamics platform, this could very well be your basis for records to be displayed in the Time Line control.
Now I will leave it up to you to decide what business case that these set of possibilities can address.
However futuristic-ally (not sure if this a word but sounds relevant to the current context :)) speaking, may be, we can pass Time Line control record details to the HTML web resource using query string or Power Automate flow by passing request body to the Power Automate flow URL using any client side HTTP request methods.
Happy Learning! Exploring Possibilities!
